Wednesday, October 28, 2009

Owl Bag

(If you missed the last installment of the Jello Fingers, scroll down!!)


I found this adorable owl bag tutorial orignially HERE, but I changed it up a bit-- made it a little easier for you non-sewing folks out there!

I first started with this old, wrinkly tote bag (this is AFTER ironing it...)that I had laying around.


I measured the bag, then cut two pieces of brown felt. Make sure they both have an extra 1/2 inch or so for "seam allowance" (although you won't be sewing them. Just trust me on this...)
Don't forget to add ears to your front piece!!

Then out of scrap fabric, cut two eyes. Two larger circles - and two smaller ones. Then grab some buttons for the eyes.


I went ahead and sewed the eyes onto my front piece (the one with the ears). If you don't know how to, or just don't feel like sewing--> just hot glue them on!!


Next, cut out a triangle for the nose. Either sew it on or glue it on!


     The great thing about this project is you get to use up all those fun scraps!! Cut about 60-70 different sizes. Start lining some up, making sure to overlap them. If you overlap them this way, no pins are required! Either sew or glue!!


Here is my first sewn line
(sorry for the poor photo quality)


Add your next row. Keep adding rows (and individually sewing/or gluing each row) until you are about 1.5 - 2 inches away from the bottom of your nose. ( I had four layers)


When you are done with the "feathers," Add a ribbon or ric-rack to the top to give it a finished look.


Next: Add some interfacing to the back of the ears (this can be found at any fabric store. I got mine at Wal Mart)


Cut out a matching ear, and glue over top the interfacing.


Keep that hot glue gun handy! Start at the top, and just start gluing the front piece on.


Glue the back piece on, and then glue the extra "seam allowance" together.

Now you have yourself and adorable Halloween treat bag... or fun purse!!


Photobucket

Tuesday, October 27, 2009

Jello Fingers

If you missed parts one and two, scroll down!

After refrigerating overnight, crack and peel the wax molds like a hard boiled egg and rinse fingers with water!


How nasty do these look??


They taste yummy though!!


Put them on ice...


Gross everyone out! ENJOY!!


Photobucket

Monday, October 26, 2009

Jello Fingers - part Two

(If you missed part ONE--> [making the finger molds], scroll down or click HERE)


In a large bowl mix one large package of peach jello and two packs (they come in a box of four) of Knox Gelatin.

Add one cup of boiling water, and stir for five minutes.


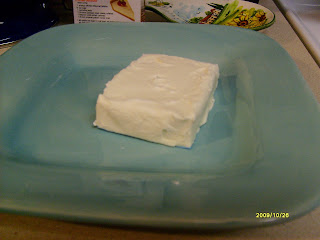
Add one 3 oz (room temperature) thing of cream cheese


Add one drop of yellow food coloring and 3/4 cup COLD water. Mix well


Using a turkey baster or liquid measuring cup, pour jello into molds and add a small red pull apart Twizzler to each mold
(veins, of course!)


Let set in fridge overnight!

Part Three (the FINAL installment) will be here tomorrow!!


Photobucket

Saturday, October 24, 2009

Halloween: Jello Finger Mold

Here is part ONE of our Halloween Jello Fingers!! Part two will be up on MONDAY. Enjoy!!


MOLD:


Melt four cubes of paraffin wax on low

Wet your hands in ice water, shake off excess, then quickly dip into wax. Repeat this process until hard enough to peel off fingers- without cracking.


(Thanks Katie for letting me tape you!!)
(If you need to turn the music off, scroll all the way down to the bottom!!)

Photobucket

Tuesday, October 20, 2009

How to Add a Blog Signature

I've had quite a few people ask me how to add a signature to their posts, so I decided to let ya know! (When you make one all I ask is to let them know you got the idea here!!)

 Have you heard of scrapblog.com? Well, I LOVE it. And its an easy place to make a signature if you don't have photoshop.

   So, sign up there (its FREE)...

  1. If you want a colored background, then look through the backgrounds until you find one you like- otherwise, don't add a background in. (I didn't add one)

 2. Either look through the 'stickers' for letters, or use the Text (ABC) Box and find a font you like.

3. After you Publish it, go to File --> Export as JPEG --> then download the page you want onto your computer.

4. You'll have to crop the picture to be just around your name and whatever embellishments you used. Save it, and upload it to photobucket.

5. Grab the Direct Link of your picture (from Photobucket) -- and save it in a Word document in case you need it later.

6. Go to Dashboard --> Settings --> Formatting. At the bottom of the page is a Post Template Box. Put this code in it:


           [p][image class="centered"alt="post signature" src="SIGNATURE URL" /][/p] 
     
   Make sure to replace all of the [ with < and all of the ] with >   Did that make sense?? =) If I added in the < and > for you, it makes it HTML and will not appear properly for you!

7. Replace SIGNATURE URL with the Direct Link you saved!! 


  FYI: The signature will only appear on FUTURE posts, not already published ones. To make sure it worked, write a post. Need a post idea?? Tell your friends about this website!!        


Photobucket

Sunday, October 18, 2009

Cupcakes = Pure Joy!

I ADORE cupcakes. They are adorable and so fun to make!

                                We even had them at
                                  our wedding!!


Well, tonight I made some chocolate cheesecake brownie cupcakes and oh boy, they were DELICIOUS!


Photobucket


[Travel] Wipes Case Tutorial

You'll need two 9x 6" pieces of fashion fabric,two 9x6" of felt, 1.5 yards of coordinating
ribbon, and whatever embellishments you'd like!


Here they are all cut out...


Take your travel case and hot glue the FELT on first (on both sides).
This will help hide the marks on the wipes case...
Make sure you glue the fabric on straight!!
side note: i used thin scrap flannel that i had,
so to make it thicker, i just used two pieces on each side!


Glue on the fabric fabric next (on both sides)


When you are finished gluing it on, make sure to trim the fabric, but not
too much!


Pick out some coordinating ribbon (3/8" wide or smaller) and hot glue it on. Be very careful not to burn your fingers!! Start in the back, that way your ribbon seam won't be as noticeable!


{Sorry these pictures are such poor quality - I took them with my phone!!}
You can add a thicker ribbon and some buttons/embellishments to the front!


I found a great tutorial for the cutest yo-yos to add to the front. It can be found HERE!!

Saturday, October 10, 2009

Elmo Cupcakes

My toddler is obsessed with Elmo- he has his bday party earlier this week and I decided to make some cupcakes.

So, here are my elmo cupcakes. I'm pretty proud of myself. The pictures don't do them justice... cuz my camera can't quite capture the "fur" which looked awesome...if i do say so myself. =) I started with white cupcakes Made some eyes! (white necco wafers and black gel frosting) Piped on the fur. I LOVE piping. I never knew... Added a nose... Attached the eyes... And finally...the mouth. Which was a pain. I really wanted to do the mouth with black pull&peel twizzlers....but apparently they don't make those anymore. So... after much deliberation I went with chocolate sprinkles.