Wednesday, December 9, 2009

Rice Heating Pad

My lovely friend Mary came to me with a great idea! She wanted to make rice heating pads for her sisters- for Christmas! So, here is what we did:


Start with two pieces of fabric, whatever size you want. Put right sides together.


Sew around the sides, leaving an opening big enough to put rice in!


Turn right side out and fill with rice... but don't over fill it.


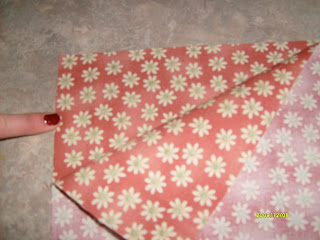
Fold your seam allowance over- where your gap is...


You can either machine stitch it closed, or hand sew. I hate hand sewing... so I used my machine. Make sure to PIN it really well, and you'll have to have someone hold it for you while you sew- otherwise rice will go everywhere! Trust me, I know from experience  because I thought it out carefully before sewing it...


Here is what ours looks like sewn... I know its not the neatest... but it gets the job done.


Next I just made a pouch for it to go in when its all nice and toasty... Mary picked out some amazingly soft, fuzzy material. Loved it. Put on some velcro to keep it shut, and there you have it!


An awesome way to relax those sore muscles!!

(Put the rice bag in the microwave to warm. Make sure the material is 100 percent cotton!)

You can also use it as an ice pack- just stick it in the freezer!


  Oh, and my new blogging friend Jeanette gave me and award and wrote a sweet post about this blog. How awesome is she? Click HERE to see the post. Make sure you explore her blog, its great!



Photobucket

Tuesday, December 8, 2009

Merry SITsmas!

Just wanted to say Merry SITSmas to everyone! My original post never showed up, so I wanted to make sure I got this on here real quick. If you haven't heard of SITS, click here. Its an awesome way to meet new friends!!


Photobucket

Sunday, December 6, 2009

Crock-pot Lasagna


My great friend Mary gave me this recipe awhile back, and it has become a family favorite. My boys just LOVE it.

And it couldn't be easier!!


You make this in layers. (This is my second layer)
First, add the noodles!


Then some (already browned) meat!


Next, you add some cheese! I mix shredded cheddar and parmesan.


A little cottage cheese...


And some sauce! Not too much, because you add it each layer and you don't wanna drown the lasagna!


Repeat the layering process two more times (for a total of three layers) - and top it off with your cheese!!


Now, my crock-pot cooks pretty fast - so this is always done in 2 hours on low. It is SO delicious!!


Enjoy!!


Photobucket

Tuesday, December 1, 2009

Wow. What a llooooonnnggg Thanksgiving week it has been. Did ya miss me? =)  I definitely missed blogging. It really does help keep me sane. So here I am, 27 hours of driving and two sick kiddos later. It was great though.


 Here are some blog awards I received! I'm so excited!!!

My very first award if from an adorable blog, Two Normal Moms.


The rules of this award are to pass it on to 15 other blogs. That's alot... I'll try my best!!


I know that's only five...I'll have to finish later! =)

I ALSO got this award from Holly over at 504 Main!


I have to list 10 random facts about myself (rules of the award!)...

1. I am 5 feet tall.
2. I LOATHE tomatoes. But I like ketchup, spaghetti sauce, and sun-dried tomatoes...
3. I only went to two years of high school. (The other two were spent in college)
4. In-N-Out Animal Style fries are amazing. mmm
5. I love to dance
6. My oldest son was born exactly nine months and one week after I was married...
7. I love The Office
8. I hate surprises. SO much so that I'm even terrified of opening refrigerator biscuits...cuz you never know when they will make that horrible popping noise!!!
9. I am a little ocd about germs. I hate germs.
10. Big Band music makes me happy. =)

This award goes to:


and


Photobucket

Saturday, November 28, 2009

SORRY!!

Our internet was down for a few days, and then we went out of town for Thanksgiving-- so i have NOT been able to get on and blog... its been weird. I only have a few seconds on here, but I just wanted to say SORRY and I have so many blogs to comment on and an award or two to post. I PROMISE I will be back on by Tuesday! Its been a looooonnnnngggg holiday....


Photobucket

Friday, November 20, 2009

Heavenly Cinnamon Rolls

Holy cow... BEST cinnamon rolls ever.
Like, these are insane.


Mix In Bowl By Hand:
*3.5 c warm water
*1 c vegetable oil
*3/4 c sugar
*6 TBS yeast
Let stand for 15 minutes

Then add:
*3 eggs
*1 TBS salt
*10 cups flour
Beat until smooth and elastic

-Roll out 1/2 of the dough unto a thin rectangle
-Spread softened butter over surface
-Spread brown sugar on top!
-Sprinkle cinnamon on top


-Sprinkle a little flour on top and roll up.
-Slice 1 1/4 inch pieces
-Repeat with remaining dough
(Tip: I like to slice them with a long piece of thread. Hold each end of thread, slide under the rolls, bring up & cross! Make sense?)

Spray some glass dishes and stuff them in there.


Bake @ 375 degrees for about 15 minutes.

Now, the frosting! I've experimented with all different types of frosting, and I've found this one tastes the best with these cinnamon rolls.

* 1 stick butter
*4 TBS. milk
*1 tsp. vanilla
* 1.5 pounds (6 cups) powdered sugar

-Melt butter, milk, and vanilla. Stir in powdered sugar!
Frost rolls while warm!!


Just drip it all in there. mmmmmmmmm.
And as you can see, it makes a ton-- your friends will LOVE you!


(Side note: I realized that this picture does not feature the frosting recipe I included. This one has a yummy cream cheese frosting, which is good- but almost too sweet. There really is such a thing. Unfortunately.
Anyways, don't be alarmed if your frosting doesn't look like mine!)


Photobucket

Thursday, November 19, 2009

Project: I Can Survive!

So.. I've had an interesting last few days! Sorry if its taken me awhile to get back to some of you!! 


First off, before I forget!! Check out this fun DIY Show Off!!


The DIY Show Off


Second,
When I first started this blog- I didn't intend for it to be a "craft blog" (cuz my awesome sister in law just started one... and i didn't wanna "copy" her) Can I just tell you what a talented family I married into?? My two SIL started the Shabby Baby line, which has now grown into more of a shabby girl line. They are amazing!! And I didn't intend for it to be a "recipe blog" either. But, as I start this journey of getting through Postpartum Depression and Anxiety (which I've not told many people about til NOW!! augh.) I find crafts and fun things to cook are what make me happy. I'm going to try and blog about other things as well... so bear with me if it gets a little crazy!!
With two little ones at home, its hard for me to post everyday--> but I will try my best! Don't give up on me. =)

Photobucket

Monday, November 16, 2009

Thanksgiving Cupcakes!


So... I know that I blogged about Christmas the other day- but don't worry! I haven't forgotten about Thanksgiving. Here are some adorable cupcakes to brighten your Turkey day!


Start by baking any flavor cupcakes (I LOVE lemon!!).


While those are cooking, grab some coconut flakes, and brown them in a pan. This is a bad example picture, I have WAY too much in the pan...which I learned the hard way. =)


After your cupcakes are cooled, frost them - and top them with a Toasted Coconut Marshmallow (they come in that flavor!!). Wet a toothpick, and poke two small holes for eyes (chocolate sprinkles) and a bigger hole for the beak (a swedish fish!)


Next, sprinkle with your toasted coconut!


Add either AquaLife swedish fish or candy corn for tail feathers. SO easy, and just too darn cute!


Photobucket

Thursday, November 12, 2009

Cookie Sheet Christmas Countdown

{p.s. do you like my new layout? I also have a NEW button, so be sure to grab it!! Thanks!}


I've seen some of these floating around online, so I'd thought I'd give it a try!!

You start with a plain old cookie sheet! You can use either the front or back ( I chose front) - spray paint it!

To cover it, I used fabric- because I liked my fabric choices better than any paper I had. Paper works wonderfully too tho!!

I mod podged it on...


I left a little space at the top to add in some contrasting red fabric!


Then comes the fun part- making the magnets! You can use whatever you'd like- buttons, bottle caps, ornaments, paper, anything. I added the numbers in with a mixture of stickers, ink, and rub-ons.
This is your time to get creative!
I also added in a calendar template- which I made in Word. All you have to do is find the Tables button & make it 5 x 5.


Gorilla glue some ribbons on for decor and hanging, and there you have it! A one of a kind Advent calendar!


Photobucket

Wednesday, November 11, 2009

Soft Ginger Cookies


The other night our friends K&S dropped off the yummiest, softest cookies ever. These are like to die for! No joke. 
So, I grabbed the recipe from them and now am sharing it with all of you! 


*2 1/4 cups flour
*2 tsp. ground ginger
*1 tsp. baking soda
*3/4 tsp. cinnamon
1/2 tsp. ground cloves
1/4 tsp. salt
*3/4 cup butter, softened
*1 cup white sugar
*1 egg
*1 TBS. water
*1/4 c molasses
*2 TBS. white sugar (to roll cookies in)

Preheat oven to 350 degrees. Sift together all dry ingredients. In another bowl cream butter and sugar. Beat in egg, then stir in water and molasses. Gradually stir in dry ingredients. Roll cookie dough into walnut-sized balls. Roll in extra white sugar and and then flatten dough.
Place on foil lined cookie sheets for 8 to 10 minutes. Let cool for 3 minutes on cookie sheet before removing.

(A tip: To get the SOFTEST cookie, cook until almost done- which was just 8 minutes for me. While you let them cool, the hot cookie sheet cooks them to the perfect temp!)

Nothing says The Holidays like homemade ginger cookies. mmm.


Photobucket

Cabinet Curtain

Our new place is much smaller than we are used to, and the storage is random. We have this large open storage space in our bathroom. And we've filled it with either junk I don't know where else to put or junk I just really need to get rid of.

Seeing as this is the only bathroom, I don't want our guests having to look at the mess. So I decided to do something about it!


I measured the height and width of the opening, added an inch or so on each side for seam allowances- got some CHEAP fabric, and just hemmed all the way around.
Then I folded the top down about an inch and a half and sewed across to make a casing for the tension rod to go.


And voila.
I added a little blue ribbon to the bottom as trim to match my shower curtain.


Photobucket